How To Create A Gif In Photoshop From Video
If you arrived here wondering how to make a GIF with Photoshop, it's probably because the video you uploaded to your website was slowing down the loading time. Well, you've come to the right place. In this guide, we'll show you how to make a GIF in Photoshop from video footage. It will look great on your site and will be much more optimized for speed than a video file!
With the help of a GIF, you can present any type of video on a website, on a loop. It can be a clip from promotional material, a screen recording for a tutorial, or pretty much anything you want really.
For this tutorial, you'll need some video footage and Adobe Photoshop. If you don't have a Photoshop subscription you can do a free trial, consequentially you might find that having Photoshop is a big help for web design! If your video is very long, you might want to cut it down first in a video editor like iMovie or Adobe Premiere. Photoshop also has a trim option as you import but a video editor is better if the original footage is extremely long.
Let's get started.
Final Result Preview
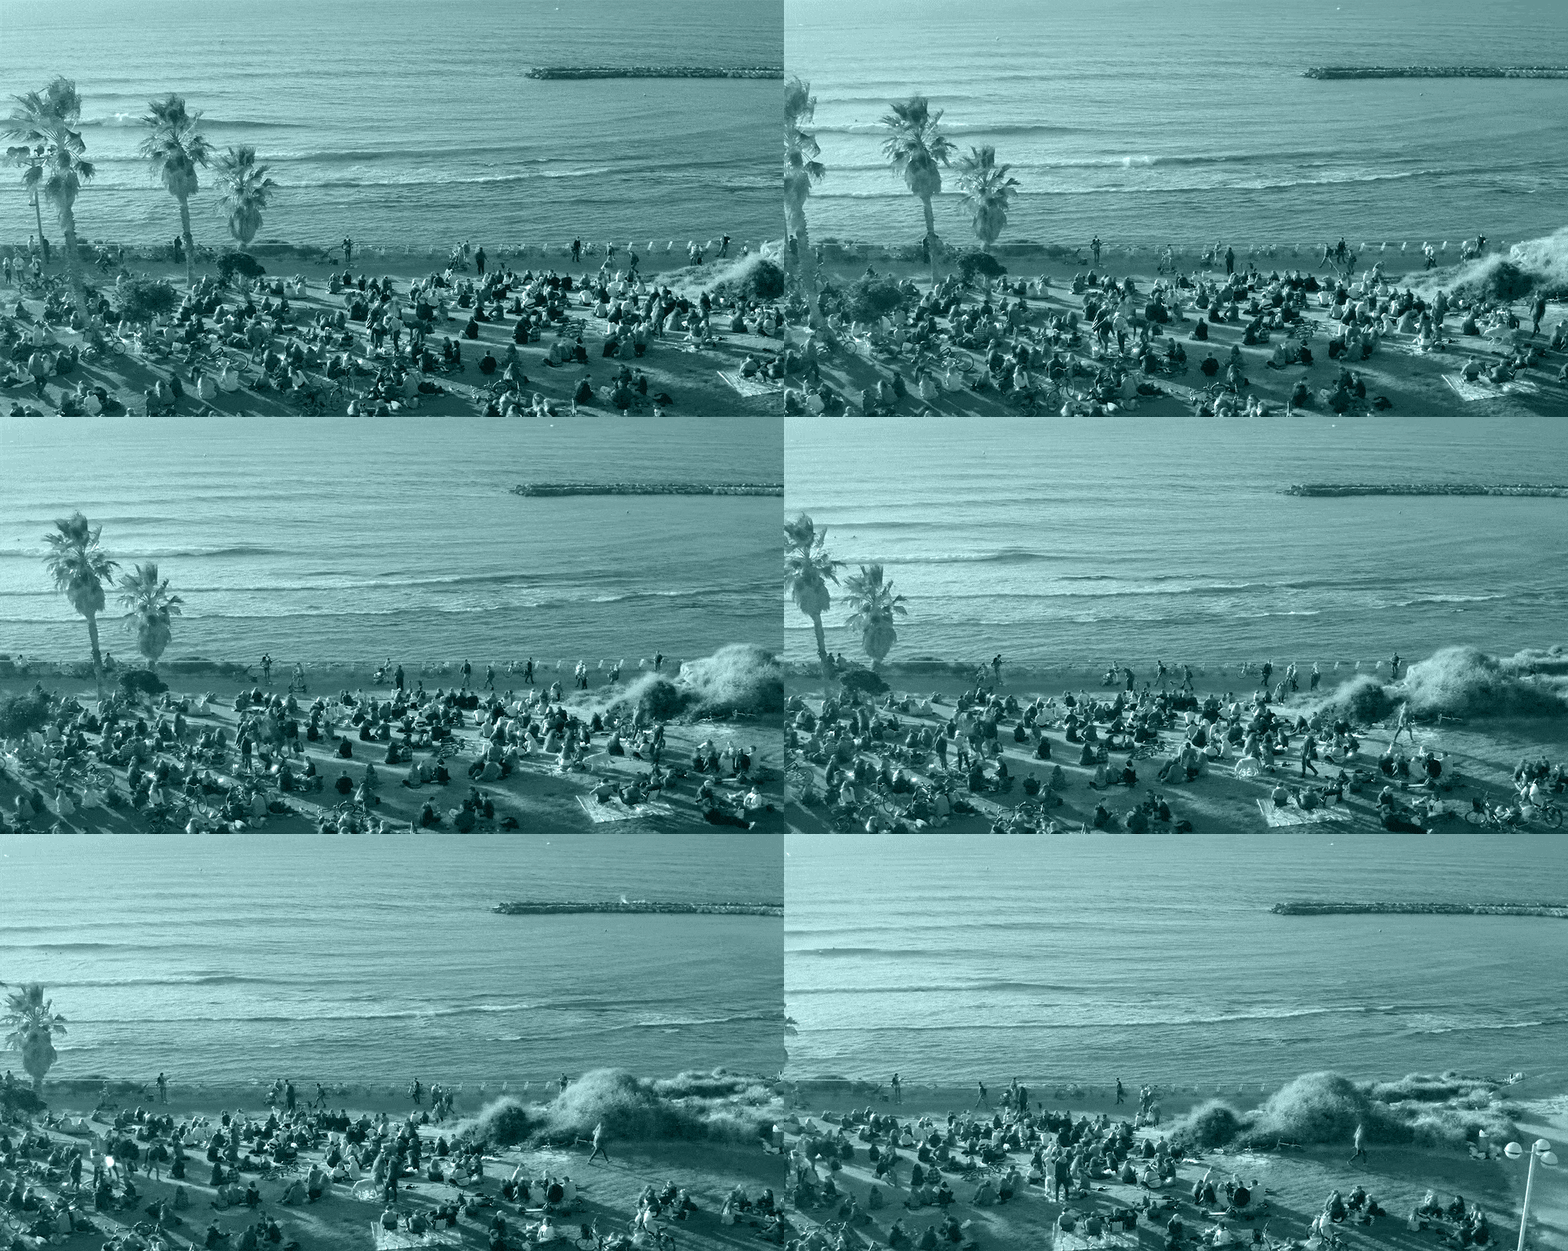
This is the final result of the GIF we created for this tutorial, perfect for a section or module background.
To Begin, Import the Video to Photoshop
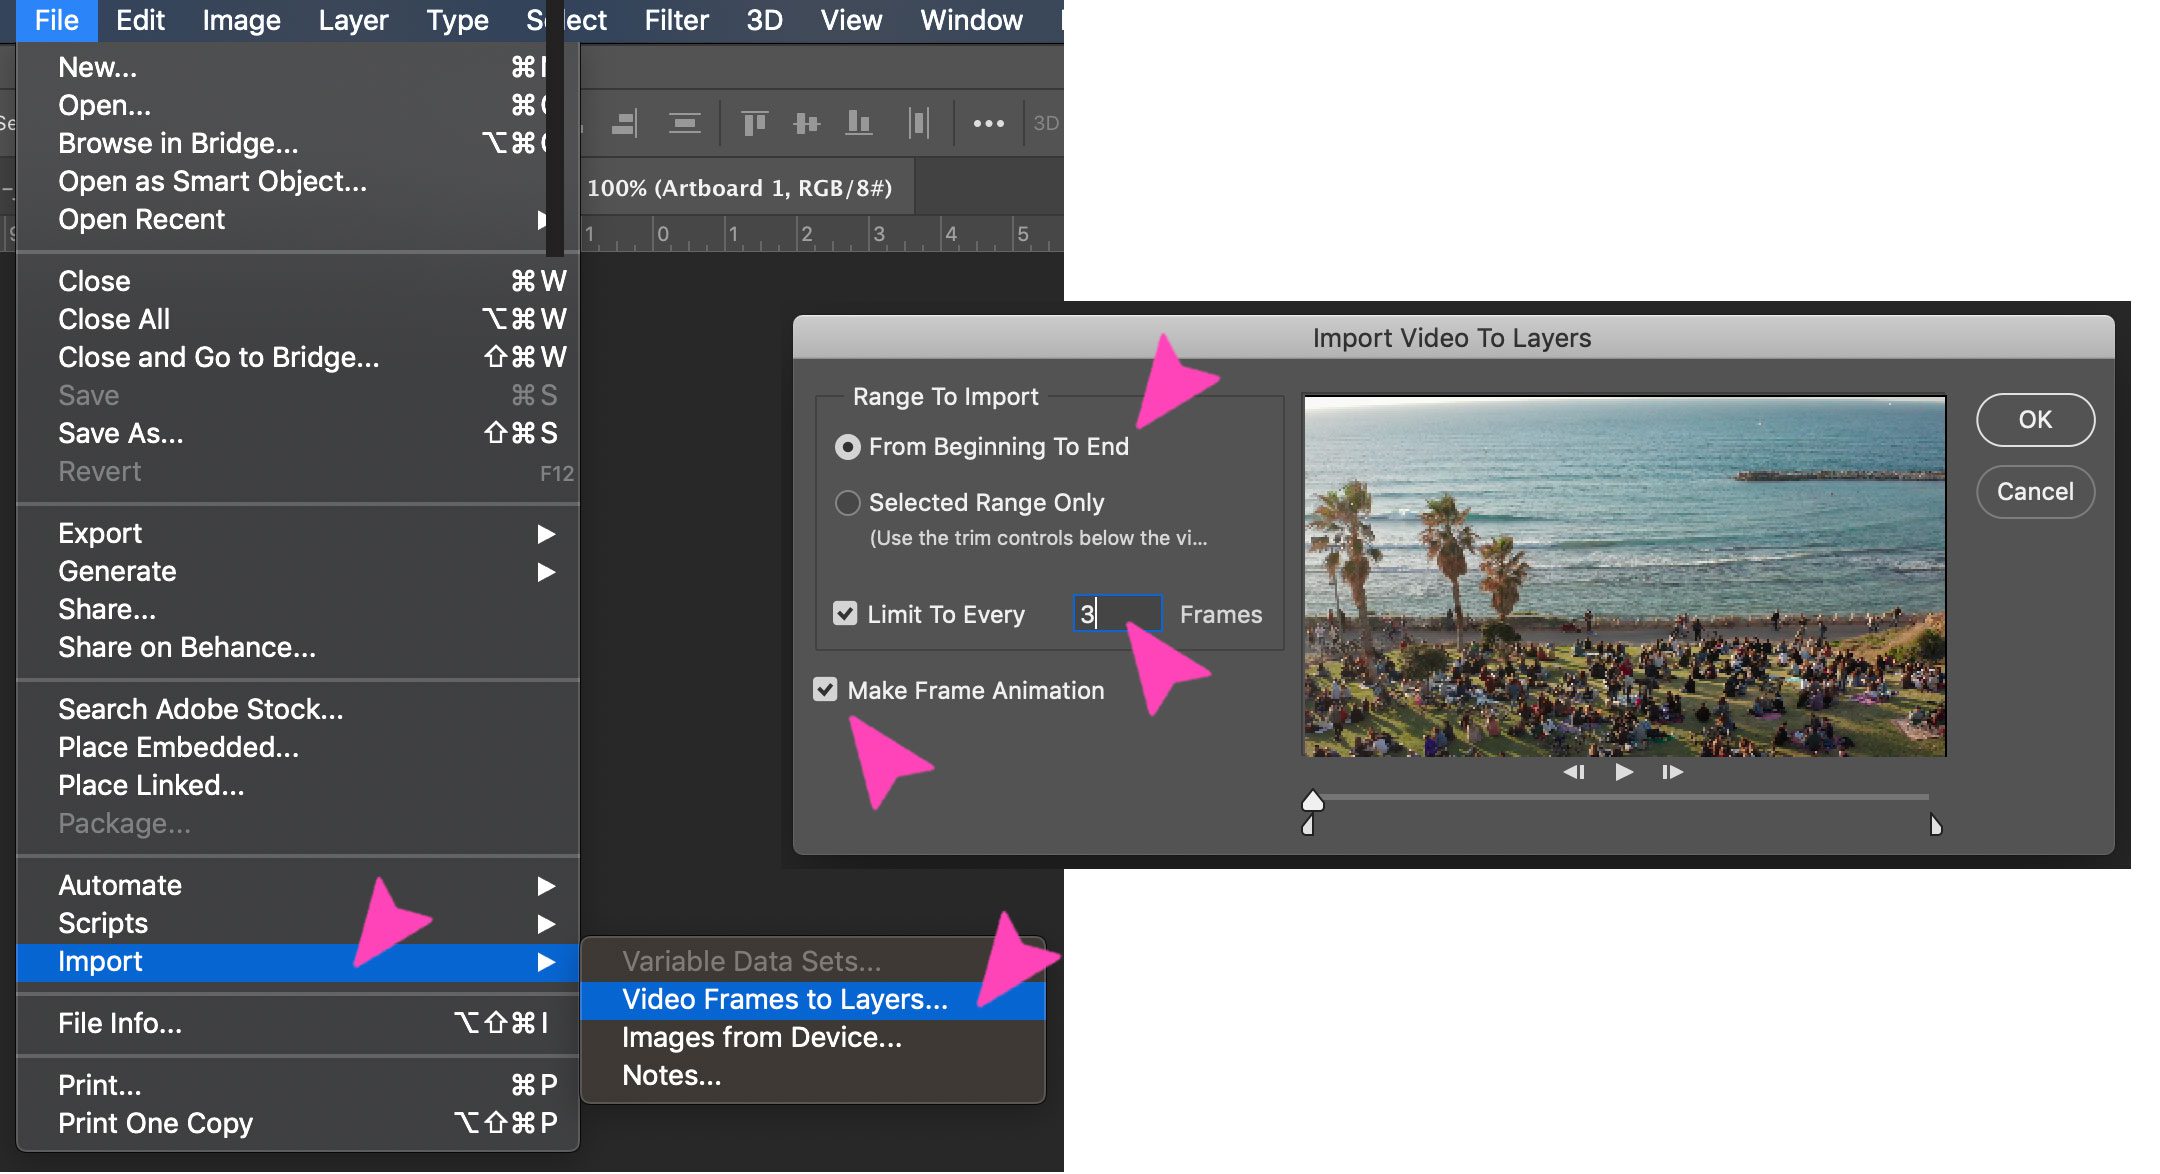
To import the video clip to Photoshop you need to be inside the Photoshop editor first. From there, click on File > Import > Video Frames to Layers. Select the video you want to use and click open.
In the popup dialog you have two choices; 1. From beginning to end – to use the video in its entirety or, 2. Selected range only – to use the trimming option and use only a section of the video.
Below that, is a choice to limit the import to a chosen number of frames. Select a small number if the video is shorter and larger number if the video is longer. This might take some trial and error until you have the right flow. For example, footage that has small or slow changes will have lots of frames that look almost exactly the same. On the other hand, if the footage is fast with lots of visual changes, if you take out too many frames it might look jumpy.
For this tutorial, we choose 'From Beginning to End' and 'Limit to every 3 frames.' Make sure 'Make Frame Animation' is clicked.
Make Adjustments to The Footage
This is the perfect time to make any kind of adjustment you want to your video footage, from size cropping to adjusting color levels. For example, there might be an unsightly object on the corner of the video or the full height of the video is too large for where you want to place it in your website design. Alternatively, if the video footage is overly saturated you can use the adjustments panel to adjust the saturation on all the layers at once.
For the creative ones out there, making adjustments to different layers will create all sorts of different effects to your GIF. What you can't do is remove backgrounds or use tools which only work on one layer at a time.
Pro Tip: Make sure that whatever adjustment you do, you have selected all the layers.
How To Crop All The Layers At Once
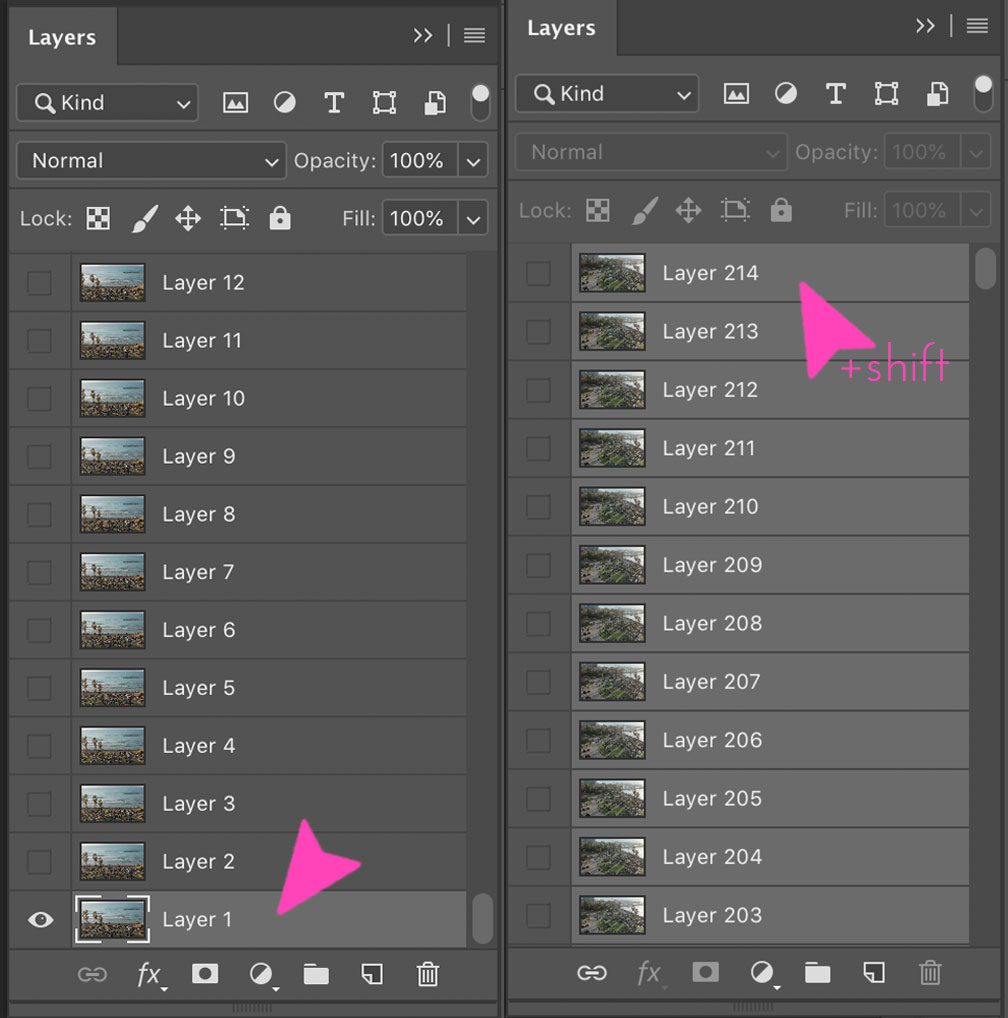
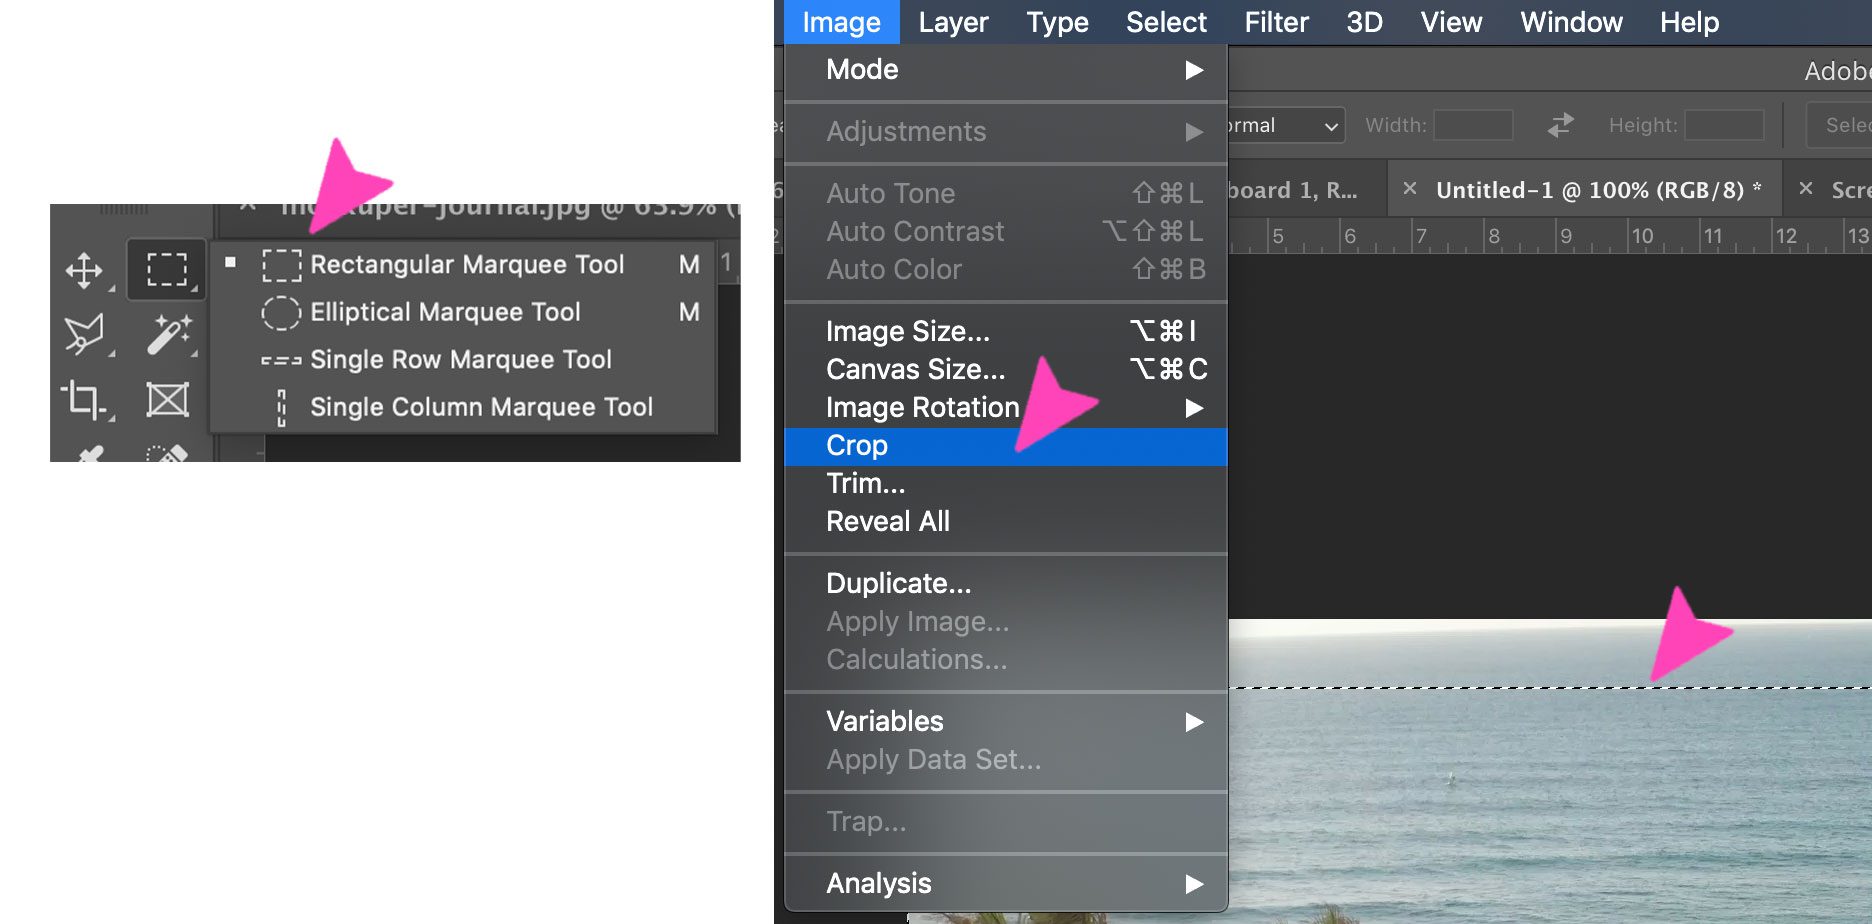
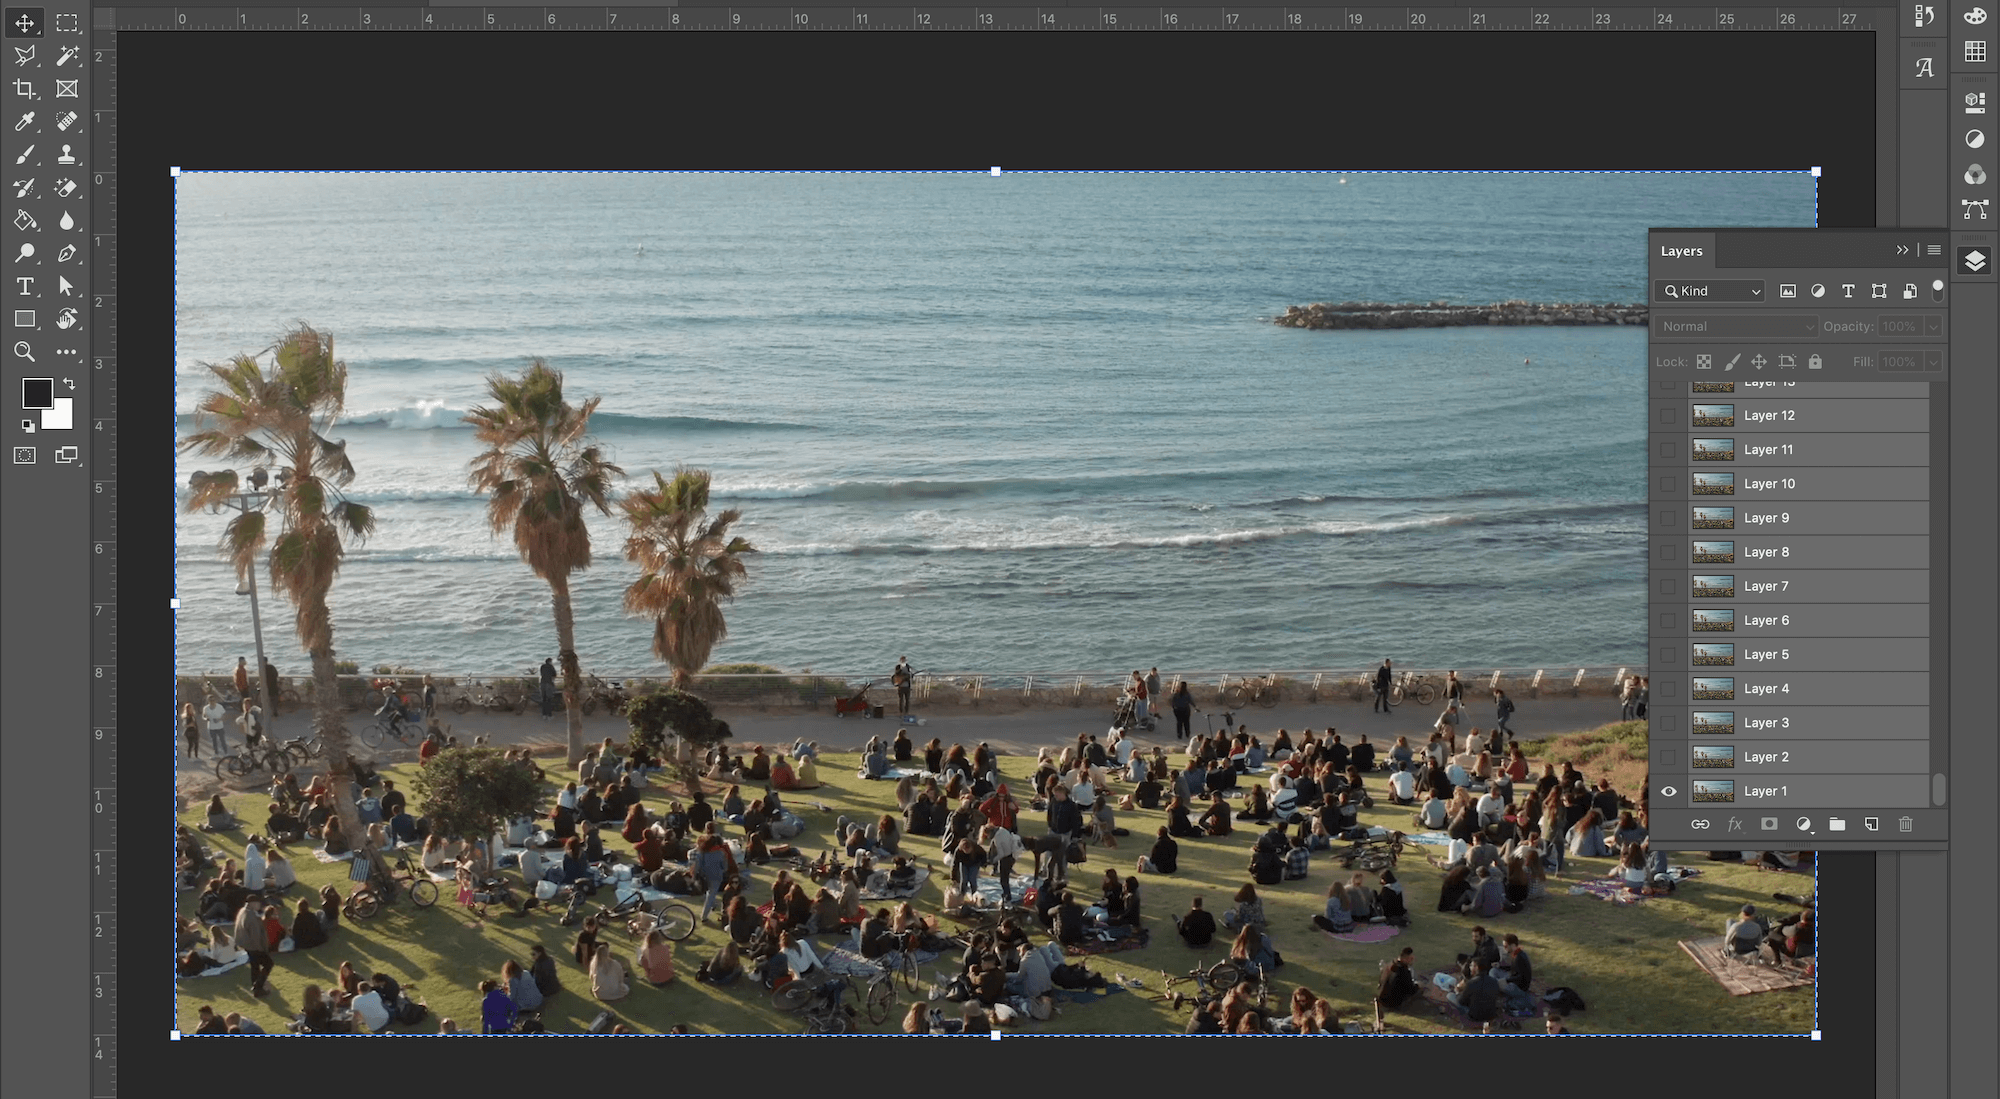
Select all the layers by clicking on Layer 1 then while pressing shift, click on the topmost layer. Select the Rectangular Marquee tool and select the are of the video which you want to keep (not what you want to take out). Click on Image > Crop and the areas outside the selection will disappear. In our video, we select the entire video area leaving a bit on the top unselected. We want to make the entire video less tall and remove the white edge of the horizon.
How To Adjust The Colors in the GIF
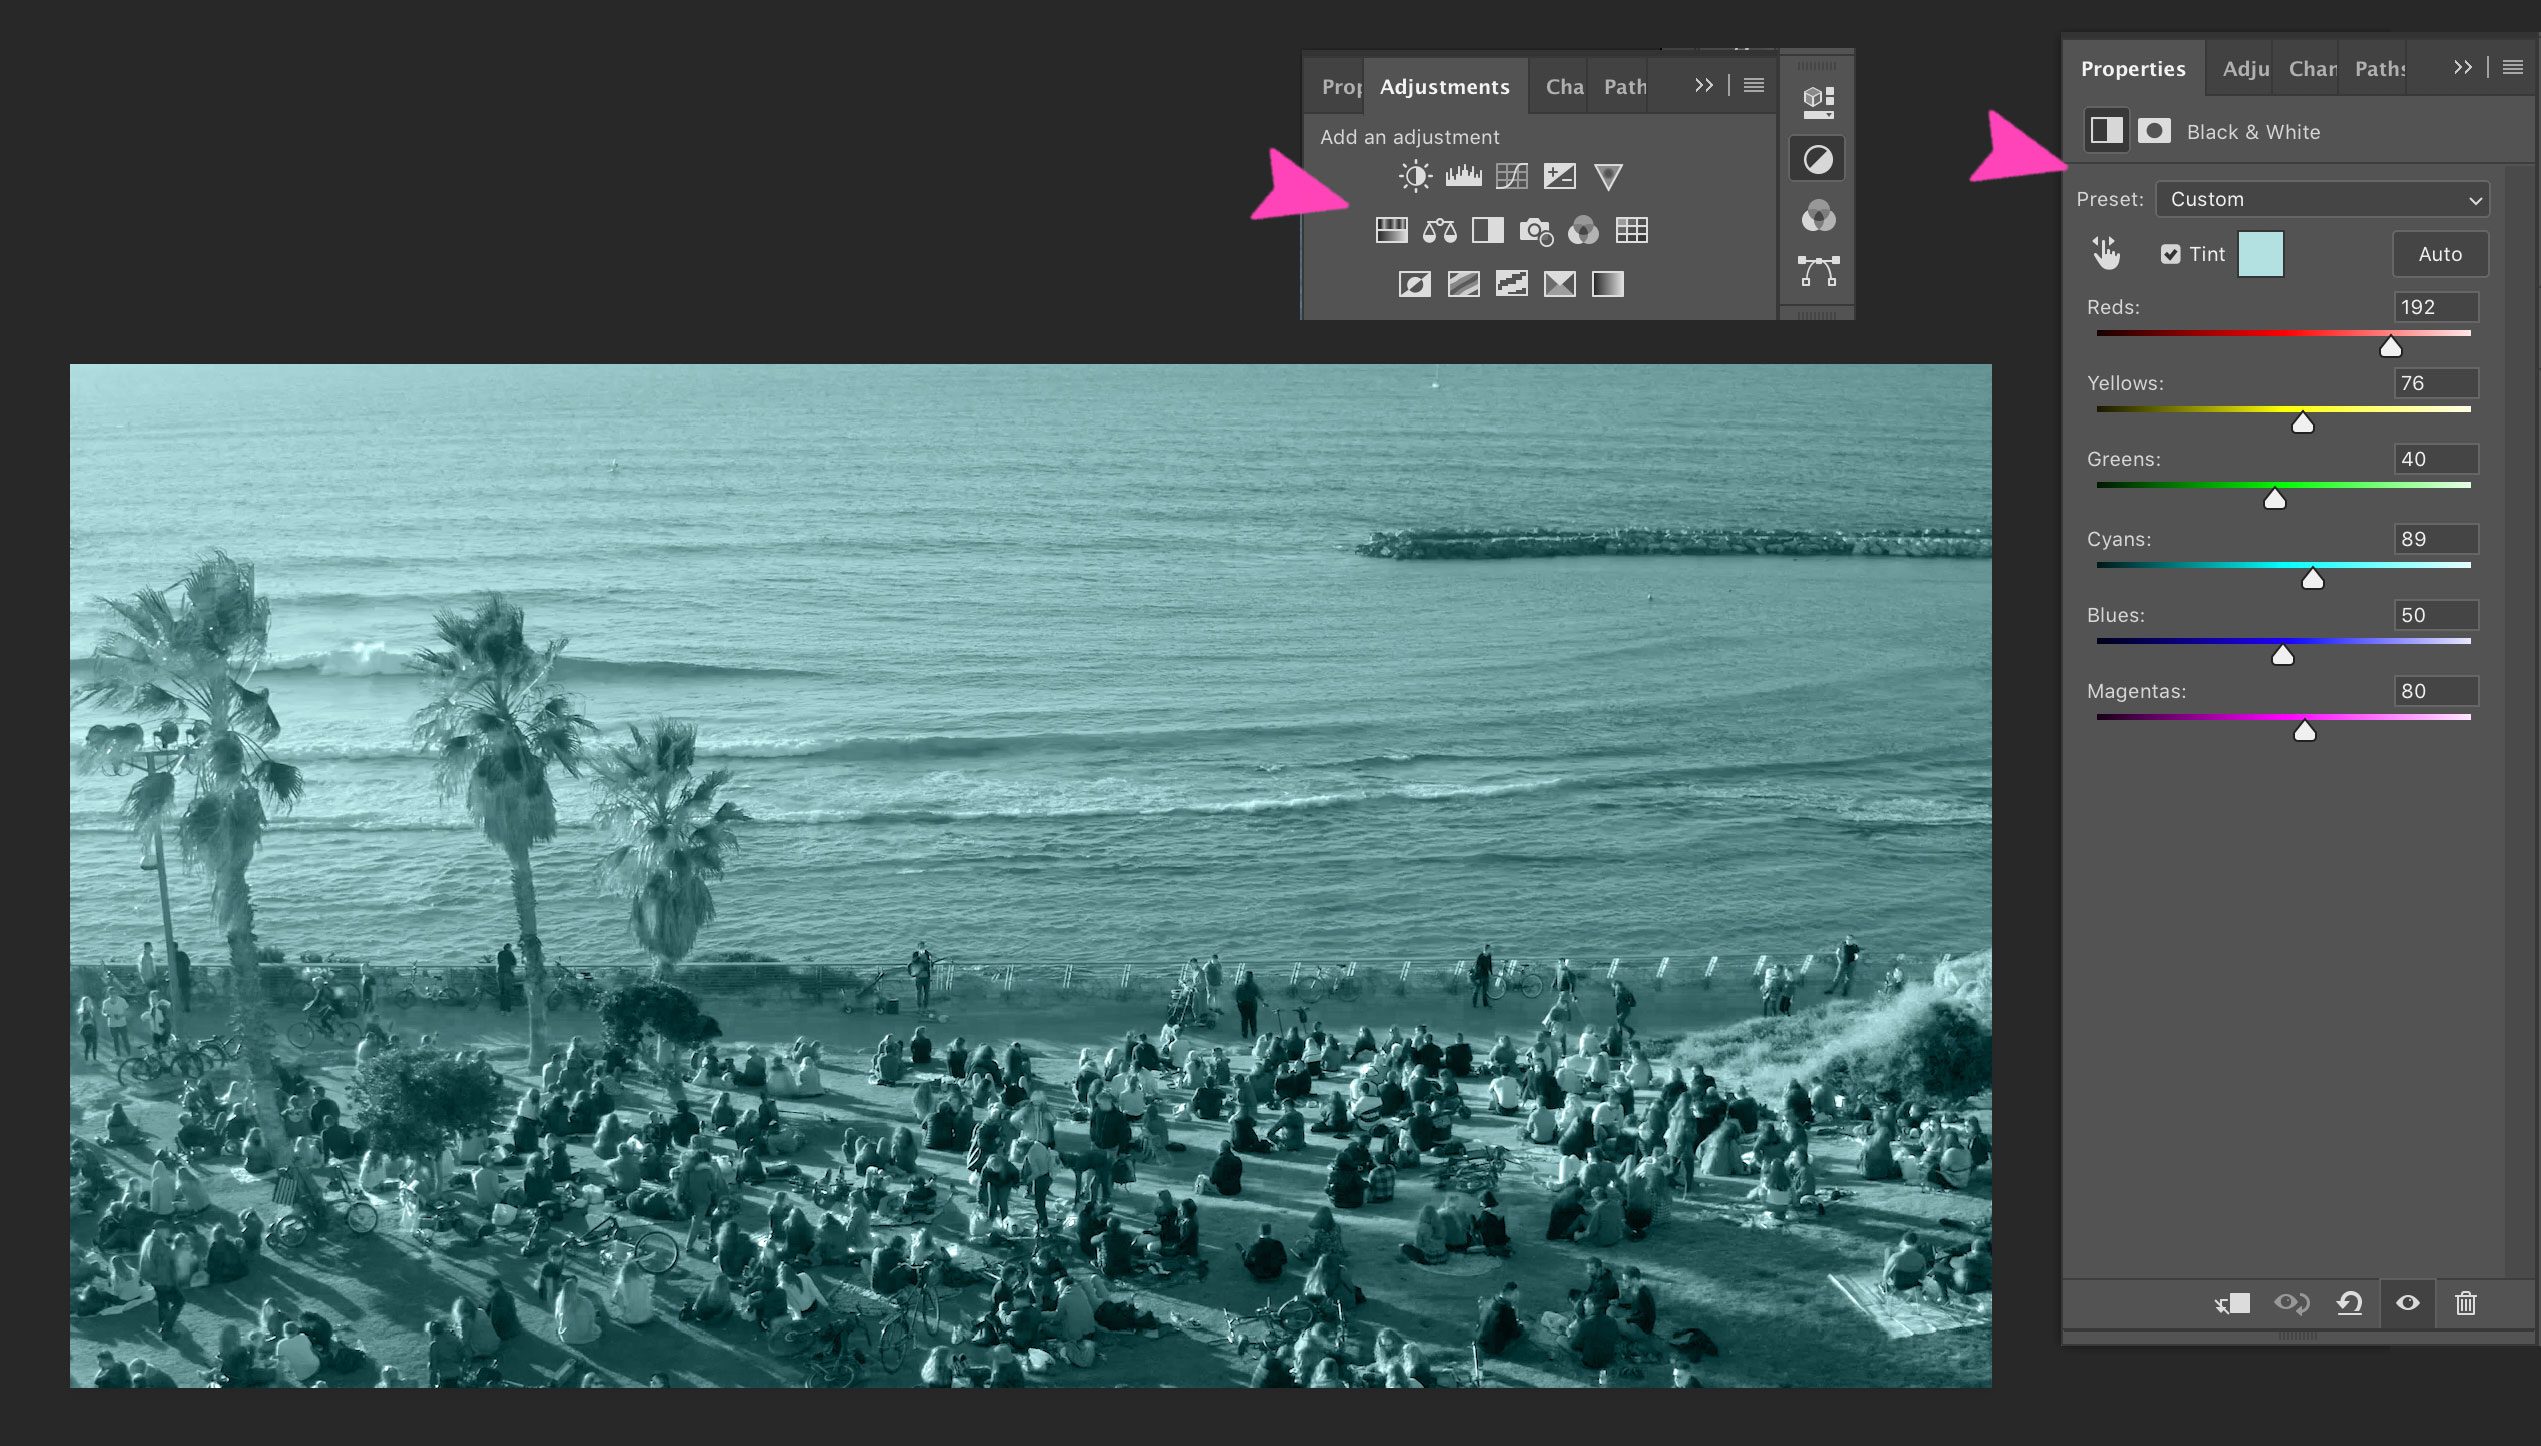
With all the layers selected, click on the adjustments tab in the Panels menu. You can use any of the adjustments tools and apply them to the layers in your GIF. For example, you can turn the colors to black and white or give it a duotone effect. We use the black and white adjustment with a tint to make the color of our video a bit more artistic. This is perfect for a background that won't get in the way with the rest of the content. You can use any color tint you like and adjust the different color levels any way you want. Just a word of advice, if you do add color adjustments, your final file will be larger than if you don't.
This GIF downloaded at 211MB without the color filters and at 312MB with the color adjustments. If you really want the color adjustments, then you have to cut down frames to make the final file smaller. More on that in the next section.
Use the Timeline to Edit the Frames
With the timeline window, you can edit the frames to decrease the final size of the GIF file. For example, extra frames at the end of the clip which just seem to lag or create a static section. The more frames you can take out, the better! But be careful you take out too many frames and the final effect becomes jumpy, take your time to check how the loop looks after deleting some frames.
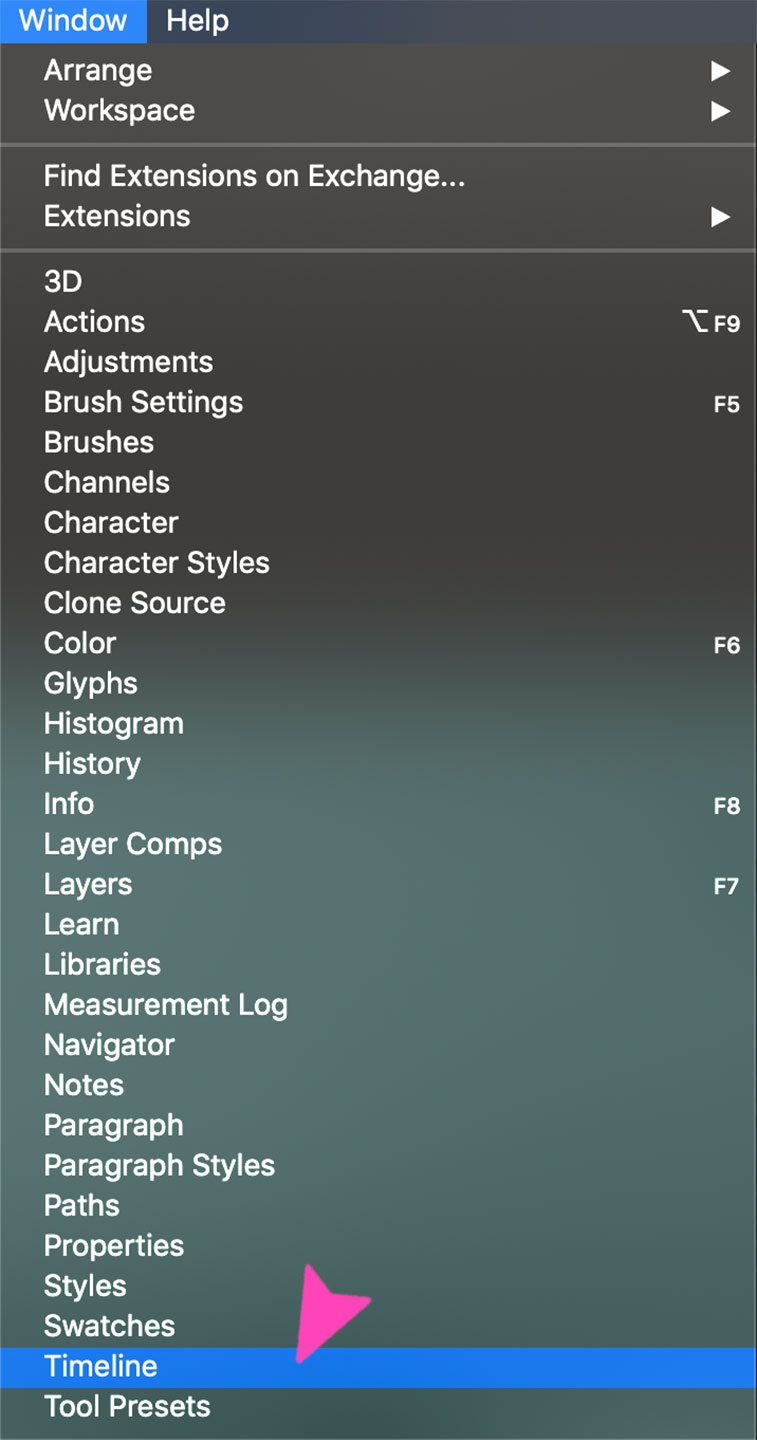
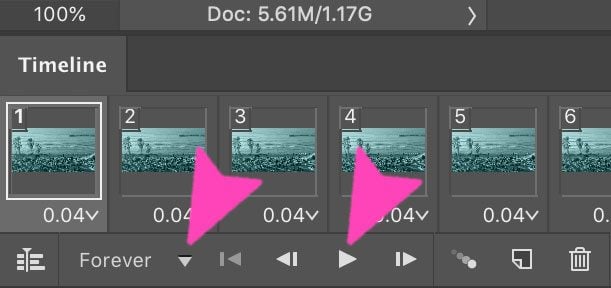
To access the timeline window and see how the GIF is working on a loop, click on Window > Timeline. A long horizontal panel will open at the bottom section of your screen. On the bottom left corner, there are some controls. Choose the loop option as 'Forever' and press the play button to see how the GIF looks. In our case, our GIF looks pretty good but is still too long. At over 200 frames and with a color adjustment, the final file is a whopping 312mB. You can check the size of your final file by following the steps in the 'Save As a GIF' section below. After you take a look, just press cancel instead of saving. You will also be able to diminish the size of the file with the Export for Web options.
How to Delete Frames to Make the GIF File Size Smaller
To make our GIF much smaller, we take out the last 200 frames. The complete video has a section where the drone camera turns and pans left towards the park behind the beach. We didn't need it. Now our GIF weighs 160MB. Still quite large. We don't take out any more frames because it will get jumpy, so we leave it as is to optimize later with the 'Save for Web' options.
To delete frames, you can select one and press the trash icon which is under the play functions of the timeline window. Similarly, you can select a consecutive group of frames by clicking on one and then frames before or after by pressing shift+click. If you don't want to cut footage from the beginning or end of the GIF but want to make it shorter, delete alternate frames by pressing on one and then command+click every other frame.

We love how when you make a GIF on Photoshop with video, you can cut sections of the footage both at import and afterward! So practical.
How to Change the Speed of the GIF
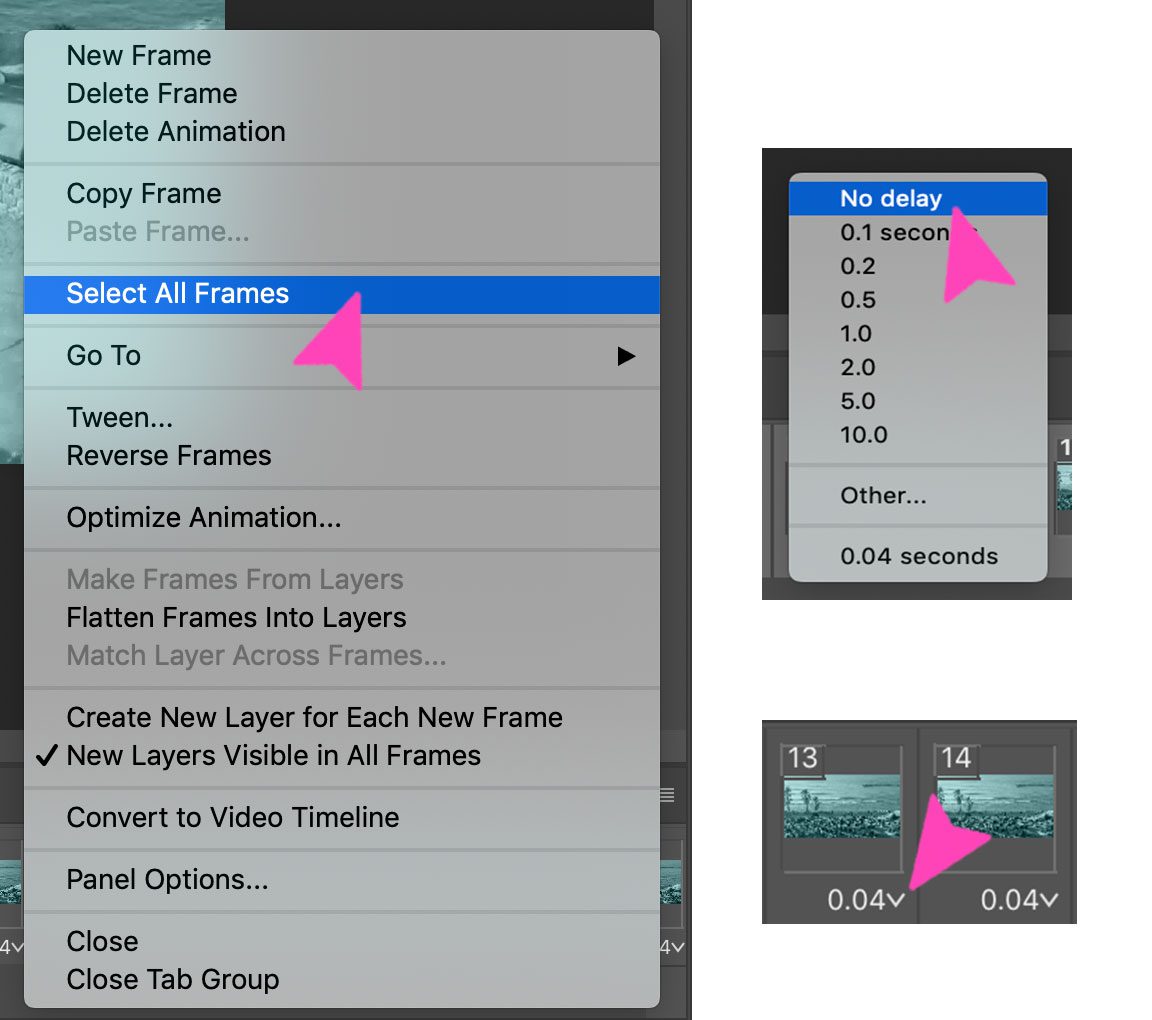
The timeline window also gives you the option of slowing down or speeding up the GIF. Each frame in the timeline has a speed control underneath it. The default measurement is 'no delay' or '0' but it can happen that the video you used already had a speed adjustment. This is the case with our video. If you look at the screenshot above where we delete frames, you can see that our frames have a delay of 0.04 seconds. When we preview the GIF it looks like it's sped up. We don't want that.
We select all the frames in the timeline by clicking on the three lines at the top left corner of the timeline window and click on 'Select all Frames.' On any of the frames, we click on the little downwards arrow and choose 'no delay.' This will make our GIF flow naturally. To create a GIF which looks like it's going on slow motion, choose any value above 1 second.
Save As a GIF and Optimize
When everything is finished, it's time to save the project as a GIF. Click File > Export > Save for Web (Legacy) and choose the GIF option in the popup dialog. Check on the size of the file and consider it's output. There are a few things you can do to reduce the file size.
- Reduce the color count.
- Reduce or remove the dither.
- Reduce the height and width.
To check how the adjustments are changing your GIF, click on the Preview button. Use the 2-Up and 4-Up tabs to see different options. You might have to go back and remove more frames if it's still too big. Aim for a file size below 20 MB. If you were creating a GIF for a fullwidth section, you will need to really cut down the frames to be able to get it at a good size for the web.
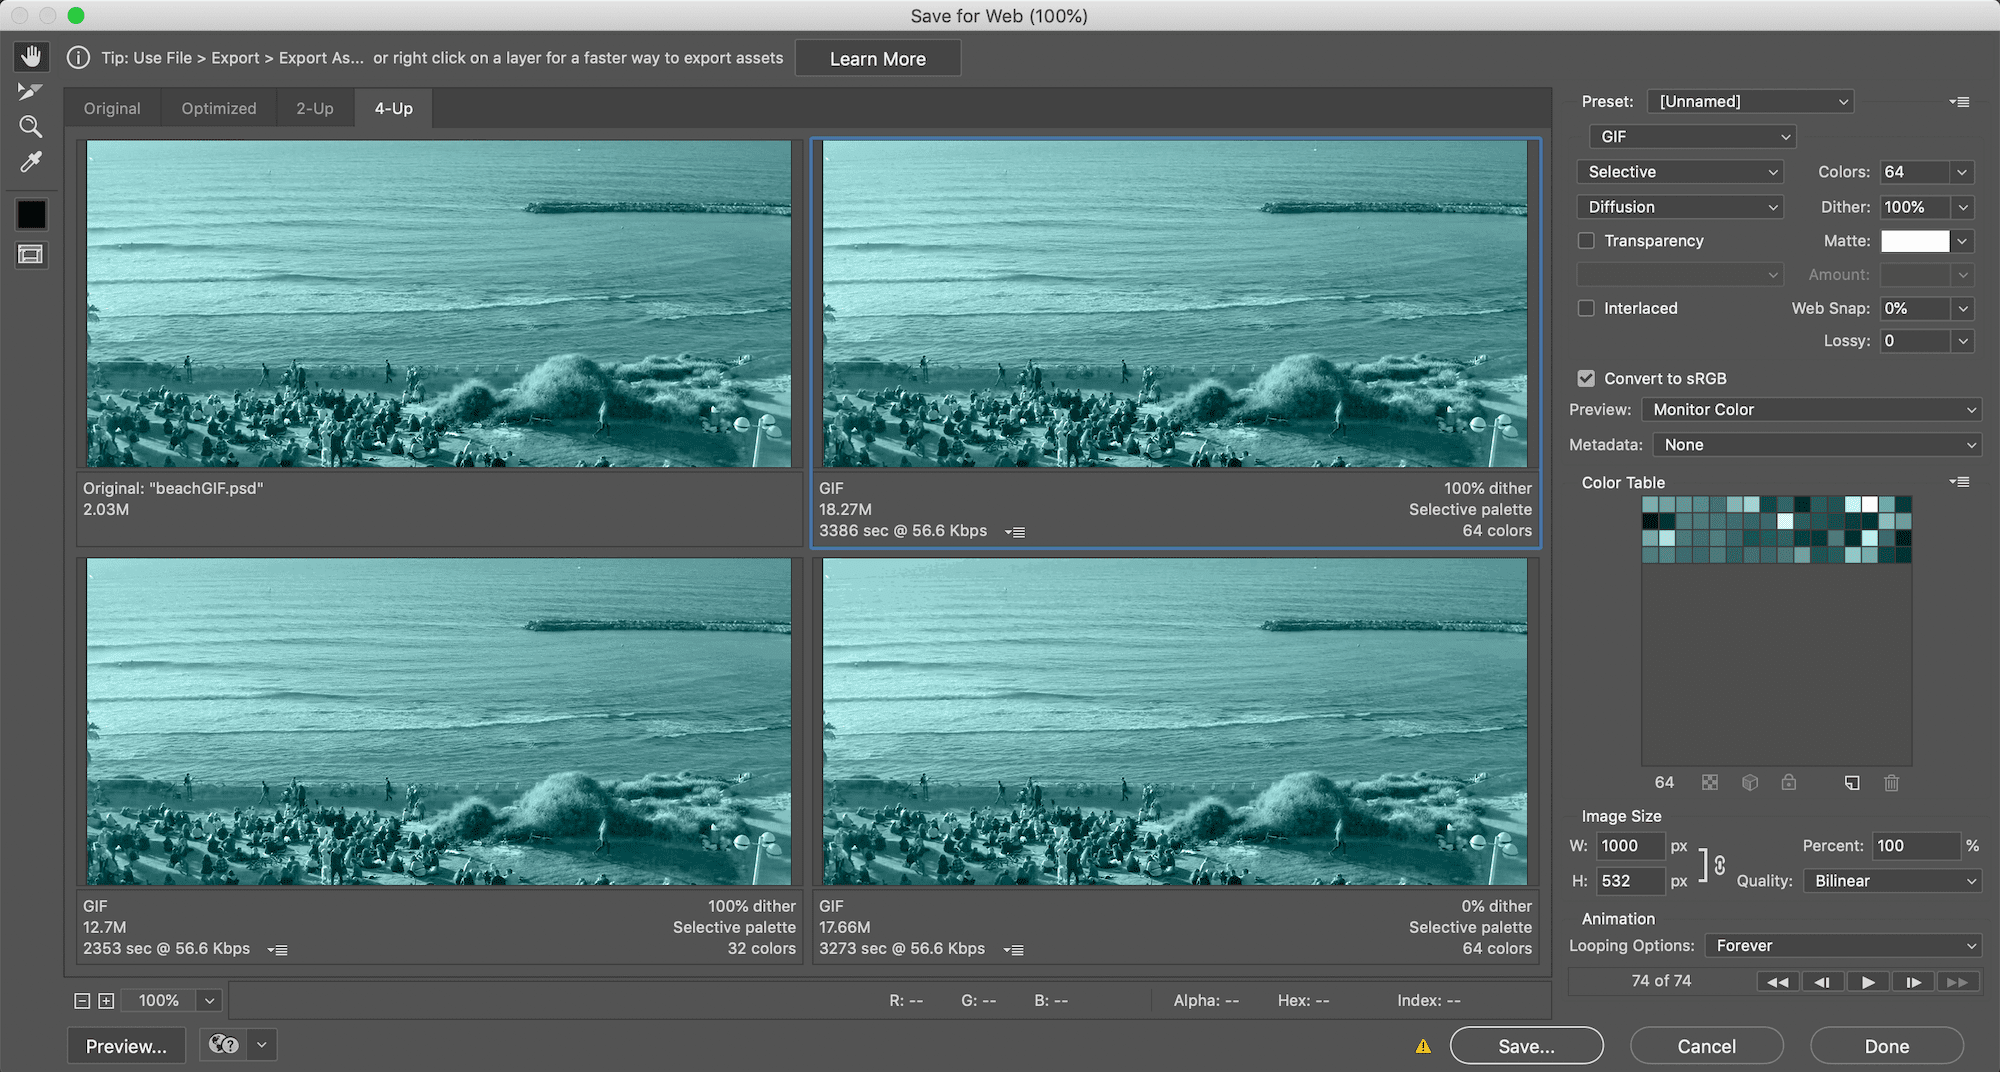
A good rule of thumb is to keep your GIF files no bigger than around 20 MB. More than that is just too big. If you can manage to shrink it below 10MB without losing too much quality, then you've got a winner.
We ended up deleting more frames from our GIF to get it down to 18 MB. Then we put it through GIFCompressor, and reduced it 55%. GIFCompressor is a free online tool which reduces GIF size without losing quality. You can upload a GIF up to 50MB in size.
Conclusion
As you see, it's pretty easy to make a GIF in Photoshop from video footage. The only caveat is the length of the video you begin with and how many frames you remove. If you don't remove enough, the final file will be truly enormous, and that will be no help at all. It might take some trial runs to finally get A GIF looking just how you want it. If you are creating GIFs of screenshots for tutorials, like in this guide, you will get the hang of it and it'll be simpler every time.
Featured image via emojoez / shutterstock.com
How To Create A Gif In Photoshop From Video
Source: https://www.elegantthemes.com/blog/design/how-to-make-a-gif-in-photoshop-from-video
Posted by: watsonaccee1988.blogspot.com

0 Response to "How To Create A Gif In Photoshop From Video"
Post a Comment