How To Create A Meme In Photoshop
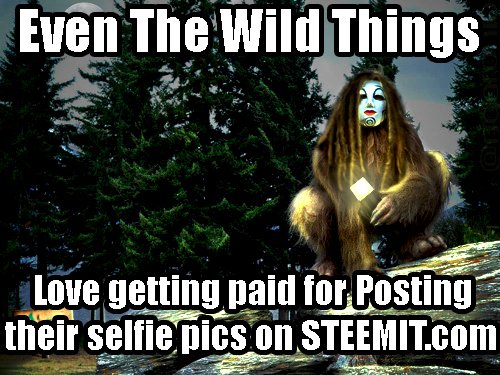
Today I learned how to create the most commonly used meme font in photoshop! The font is called Impact. Impact is an old font that dates back to windows 98, which means the font is on the majority of computers using windows.
The picture that I will be using for the examples for this "how to" tutorial is one that Is created by @rigaronib and then @papa-pepper made a contest to memeify it called Wild and Strange contest- round 3.
Here is my entry post to the contest. This is the reason why I learned to make meme font in photoshop!
The most popular Meme font that is most commonly used is made with bold white letters using a black outline encompassing each letter. Since I needed to learn how to make this font I found several very helpful tutorials and I am now teaching you all that I learned from them.
Step by step guide
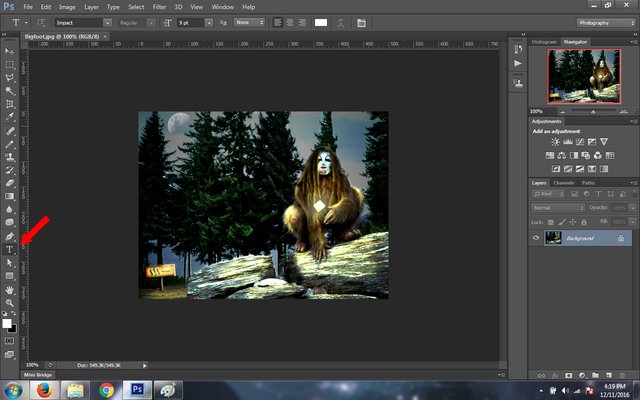
Open up your image in photoshop, Think of the caption you want to use for the photo. Press the letter "T" on your keyboard which activates the "Horizontal Type Tool" and then just click on the image to place the text. Or you can use the way that I have always used, which is to just click the "Type Tool Symbol" in Photoshop and click on your photo in the spot that you want you place your text on. Then type your text!
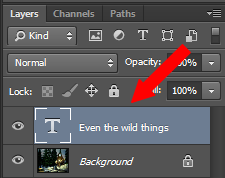
As you write your text you will notice a new text layer being made.
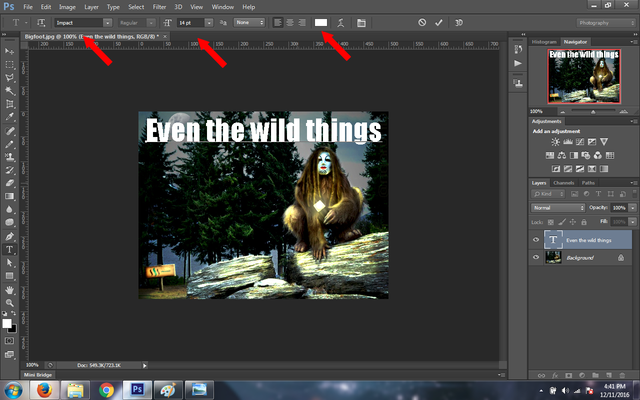
Now that you have done this, choose the Impact font and make sure the text color is white. If you would like you may change the font size. A lot of memes are written in all capitals. I chose to make the first line all start with a capital letter and the second line just normal.
Now we need the black line surrounding each letter, like all the most popular memes have. Right-click on the new text layer and a menu pops up, choose blending options, as seen below in the picture!
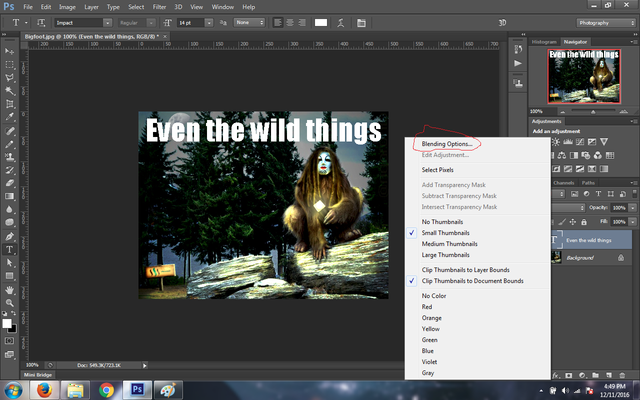
Now you will see a screen pop up. On the left bar, select the tab "stroke" as seen below You will then see this on your screen.
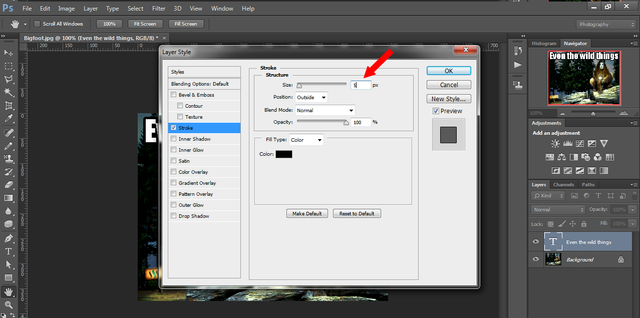
Make sure the box color is black, as that is the color that we want to outline the white letter with. Then where i placed the red arrow is the pixel size of the black outline around each letter. The default is 3 but I wanted mine to be extra large so I chose 5. Once you have finished with all of that click ok.
If you would like to move the text layer again, then just click the layer and then drag your text to where you feel it fits best!
Here is the final outcome of my meme that I made for the contest!
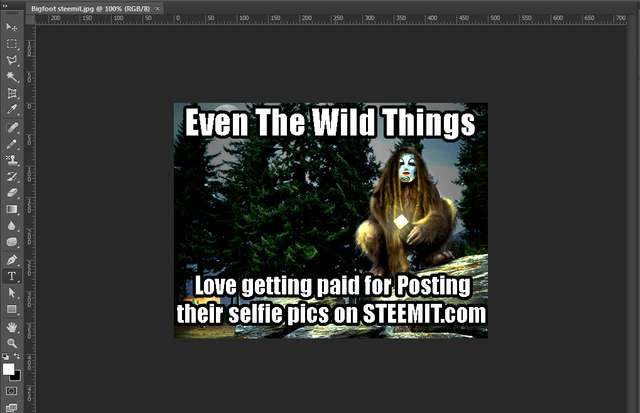
Note: I did not make these image when I was first creating my meme. I went through and made these images just for this tutorial. So therefore they are not exactly aligned with the processes that I am describing that I went through.
I hope this tutorial I made helped you. I made extra pictures to make each step very clear. If we keep on trying hard to create what we are imagining in photoshop, one day we will all become photoshop masters!
Thanks for viewing my post!


Follow Me
Steemit @ballinconscious
Image Sources:
All images created by @ballinconscious & @rigaronib
Links Used:
https://www.youtube.com/watch?v=_czy9bpC3EQ
http://knowyourmeme.com/memes/impact
https://diaryofdennis.com/2013/05/10/the-most-commonly-used-meme-font-and-a-tutorial-how-to-create-a-meme-with-photoshop/
How To Create A Meme In Photoshop
Source: https://steemit.com/til/@ballinconscious/til-how-to-create-the-most-commonly-used-meme-font-using-photoshop-cs5
Posted by: watsonaccee1988.blogspot.com

0 Response to "How To Create A Meme In Photoshop"
Post a Comment